
Lesson 6: Working With Vertices
Building on our experience of rendering triangles from our VBOs, in this lesson we'll look at a way of making these buffers more memory efficient. We'll look at implementing Index Buffer Objects (IBOs) which allow us to prevent duplication of our vertex data, and then look at rendering them as wireframes to help visualise our scene.
Index buffer objects
In the previous lesson, we defined 6 vertices to draw 2 triangles to draw 1 square. There is some logic there, but clearly it would be more efficient to only define the 4 vertices of the square we want to render once.
This duplication of data exists not just within our vertices buffer but also necessarily the colour buffer too, needlessly consuming extra GPU memory. For both of the two duplicated vertices of our square, there is an extra 3 floats defined for it's coordinates, and 3 more for it's colour value. So even on our relatively simple square example, we have 12 extra floats of needlessly duplicated memory.
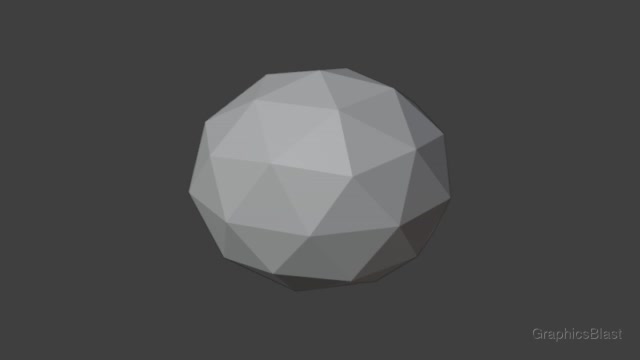
On large, complex, real-world meshes this number rapidly explodes. Visualised is a still relatively simple ball shape. We can see that at the tip of each triangle, each vertex is shared with 4 other triangles. If we calculate the same duplication value here, we have the vertex needlessly defined 4 extra times, in 2 VBOs, each with 3 floats. Multiplying this together means 24 floats of memory are wasted duplicating data on every intersection here! And this is still a simple example! There must be a better way...
Introducing Index Buffer Objects! IBOs allow us to enter unique vertex data into our VBOs only a single time, and then efficiently reuse that vertex multiple times when drawing.
The idea is conceptually pretty straight-forward.
We slim down our vertices and colours arrays to only contain the unique vertex data.
We then define a new buffer containing triplets of integers, which define how the triangles should be drawn.
For example 0, 1, 2 would indicate that to draw a triangle, we should use the first element in each VBO for our triangle's first vertex, then the second for the second, and then the third element for the third vertex.
We're defining the triangle by the indices of it's data in each buffer.
We can then add more triplets to this array to draw more triangles.
So to draw our square from the previous tutorial, our VBOs will be reduced to contain only the four unique vertices' data.
Our IBO would then contain 0, 1, 2 to draw the first triangle, and then 0, 2, 3 to draw the second (assuming it is the vertices 0 and 2 in the VBOs which are shared between the two triangles).
Instead of duplicating the data, we only need a single integer to reuse a vertex.
For any non-trivial meshes, drawing by indices should always yield a smaller memory footprint on the GPU. Moreover this efficiency increases the more complex the mesh is.
Implementation
To push an extra array containing the indices to the GPU, we will of course need to create another buffer to hold it, taking our total now to 3:
| 21. | Shader mainShader; |
| 22. | |
| 23. | GLuint vao; |
| + 24. | |
| 25. | |
| 26. | bool init() |
| 27. | { |
In our init function, we can now simplify our previous buffers to remove all the duplicated vertices:
| 104. | GLfloat vertices[] = |
| 105. | { |
| + 106. | |
| + 107. | |
| + 108. | |
| + 109. | |
| 110. | }; |
| 111. | |
| 112. | GLfloat colours[] = |
| 113. | { |
| + 114. | |
| + 115. | |
| + 116. | |
| + 117. | |
| 118. | }; |
So now our vertices and colours arrays only contain the values of the four unique vertices of our square.
We now need to also define the indices of our triangles:
| 116. | 1.0, 0.97, 0.02, |
| 117. | 1.0, 0.02, 0.05, |
| 118. | }; |
| 119. | |
| + 120. | |
| 121. | |
| 122. | glGenVertexArrays(1, &vao); |
| 123. | glBindVertexArray(vao); |
So again when it comes time to draw our triangles, OpenGL will interpret this variable in triplets.
Our first triangle will be drawn using the first set of vertices 0, 1, 2, while the second triangle will use the second triplet of indices 0, 2, 3.
As we have neatly grouped our vertices array by line, this means that the first triangle will take it's coordinates from the first, second, and third line from our vertices variable, while the second triangle will use the first, third and fourth line.
The vertices will also use the same indices for the colours variable.
Note that these two must always be locked together, unfortunately.
There is no way to specify that we want to use the coordinates from line one in the vertices array and the colour value from line three of colours.
With the data in place we can then change our call to glGenBuffers so that a third buffer is generated on the GPU, with it's handle written to the third slot in vbo.
| 122. | glGenVertexArrays(1, &vao); |
| 123. | glBindVertexArray(vao); |
| 124. | |
| + 125. | |
| 126. | |
| 127. | glBindBuffer(GL_ARRAY_BUFFER, vbo[0]); |
| 128. | glBufferData(GL_ARRAY_BUFFER, sizeof(vertices), vertices, GL_STATIC_DRAW); |
With the third buffer generated, we now need to upload the data in our indices array to it.
To do this, things are slightly different to the other two VBOs we've set up, as we're no longer supplying data to the vertex shaders themselves:
| 136. | glEnableVertexAttribArray(1); |
| 137. | glVertexAttribPointer(1, 3, GL_FLOAT, GL_FALSE, 0, 0); |
| 138. | |
| + 139. | |
| + 140. | |
| 141. | |
| 142. | glBindVertexArray(0); |
| 143. | |
| 144. | glClearColor(0.04f, 0.23f, 0.51f, 1.0f); |
We start by binding the new buffer object for our IBO, vbo[2], but this time the first parameter is GL_ELEMENT_ARRAY_BUFFER.
Here, the word "elements" is used as a synonym of "indices", you may see it written or referred to either way in the world of OpenGL.
The flag here is just a hint to the GPU that the buffer we're binding is an IBO. This difference is because this data doesn't need to be accessible to the vertex shaders on the GPU themselves, but instead is used when deciding which geometry needs to be drawn, so might optimally be placed in a different part of the GPU's memory.
The next line, probably quite familiar by now, uploads the actual indices array into the GPU buffer - again we have just changed the first parameter to indicate that it is an IBO. The other parameters, as before, indicate the size of the data we're passing, the actual data itself, and another flag for GPU optimisation that this data is not going to be regularly modified once it's been uploaded to the GPU.
As the IBO buffer doesn't have the same ambiguity as to how it should be interpreted when compared to the other VBOs, that's all we have to do for it!
There is no need to make a call to glEnableVertexAttribArray, as first of all we are not passing any data to the vertex shaders, and second because if we are using an IBO to upload the indices, then of course we are using an array.
Likewise, we don't need to make a call to glVertexAttribPointer as it doesn't make sense to say how many array elements should be passed in to each vertex.
So that's now our IBO set up.
As we're finished with the init function let's go straight to the close function and make sure we tidy up before going any further:
| 151. | void close() |
| 152. | { |
| 153. | glDeleteVertexArrays(1, &vao); |
| + 154. | |
| 155. | mainShader.deleteShader(); |
| 156. | |
| 157. | SDL_GL_DestroyContext(context); |
| 158. | SDL_DestroyWindow(window); |
| 159. | SDL_Quit(); |
| 160. | } |
We simply need to update the call to tell OpenGL that vbo is now an array of 3 buffers to delete rather than 2.
Finally, we just need to update our draw function to make use of our IBO:
| 221. | void draw() |
| 222. | { |
| 223. | glClear(GL_COLOR_BUFFER_BIT | GL_DEPTH_BUFFER_BIT); |
| 224. | |
| 225. | mainShader.bind(); |
| 226. | glBindVertexArray(vao); |
| + 227. | |
| 228. | glBindVertexArray(0); |
| 229. | mainShader.unbind(); |
| 230. | |
| 231. | SDL_GL_SwapWindow(window); |
| 232. | } |
All we have to do is switch from glDrawArrays to glDrawElements!
Again when you hear the word elements, just think "indices".
OpenGL will recognise we have a GL_ELEMENT_ARRAY_BUFFER bound in our VAO, and know how to take care of the rest!
The calls are quire similar, but also slightly different, so let's take a look. The first argument is still the kind of drawing to do, so still triangles. The second is the number of indices to render.
As you can see, we effectively want to pass the length of our indices variable here, not the total number of triangles.
Remember that we could otherwise be rendering points instead of triangles by changing the first parameter, so it makes sense that the call expects the number of indices to read from the array.
It's therefore our GL_TRIANGLES flag which causes the underlying code to interpret our indices in triplets.
The third parameter is the data type of our indices variable, so as we used GLuint we pass the enum GL_UNSIGNED_INT.
The OpenGL spec states that the indices data-type must be unsigned, which makes a lot of sense, but does allow us some flexibility with types.
We can pass them in as bytes, ints or shorts.
The final parameter is the start offset in our array; as we want to start from the beginning of the array, we pass zero.
TIP:
The data-type for the final parameter of glDrawElements is a little cumbersome.
Despite wanting to know the byte-offset in our array to start drawing from, the required data-type is GLvoid*.
If we want to only draw the first triangle of our square, we can do this by reducing the second parameter of glDrawElements down to 3, so the rest of the array is ignored.
However if we want to only draw the second triangle, we would need to reduce the number of indices to draw to 3 and change the final parameter so the index array starts from the fourth index, and remember that it wants the number of bytes of the offset cast as a GLvoid*.
Therefore, to only draw the second triangle, our final parameter would be (GLvoid*) (3 * sizeof(GLuint)).
With that, we now have IBOs in place!
Limitations
While rendering with IBOs saves us GPU memory, and is pretty much always more efficient, if not vastly more efficient, there are some caveats to its use.
As we talked about, the index used for rendering applies to both VBOs together.
We cannot draw a vertex using the data from the first item from the vertices array but the second item from the colours array.
This is a hard limitation of OpenGL and GPUs in general.
This means that it gets tricky if we want to render the two triangles of our square, but have each triangle have a different colour.
Let's consider one of the vertices that is shared between both triangles of our square. To make it green for one triangle but blue for another, it would need to have two different indices for the colour buffer, but this is not possible. One index used to access both the coordinate data and the colour data.
Therefore to achieve this effect, it is necessary to duplicate the data. Then we can have one index which references the coordinate position and one colour, and another index pointing at a copy of the coordinate data and another colour.
This duplication results in a loss of some of the efficiency gained from using IBOs, but is a necessity of how the underlying hardware works. Don't worry too much though, the method still is more efficient in all but a few toy examples.
Wireframe
While we're on the topic of examining how our vertices are rendered, I would also just like to talk about rendering as wireframes here as well.
A common way to find problems and debug graphical programs is to use wireframes when rendering. In wireframe mode, only the edges of triangles are drawn, but not their internal area. This makes it easier to visualise the whole scene, including any objects that would otherwise be obscured by triangles in front of them. This can be useful for identifying if large amounts of geometry are having to be drawn which might otherwise not be noticeable.
Rendering wireframes can easily be toggled on and off at run-time in OpenGL, so we're going to implement this and bind it to a key.
To keep track of whether it is currently toggled on or off, we'll set up a boolean at the start of our code:
| 14. | SDL_Window* window = NULL; |
| 15. | SDL_GLContext context = NULL; |
| 16. | |
| 17. | bool programRunning = true; |
| 18. | bool isFullscreen = false; |
| + 19. | |
| 20. | |
| 21. | Shader mainShader; |
| 22. | |
| 23. | GLuint vao; |
| 24. | GLuint vbo[3]; |
Then, when the user presses 't' on their keyboard, we'll toggle our boolean and change rendering mode:
| 191. | else if(event.key.key == SDLK_R) |
| 192. | { |
| 193. | if(!mainShader.loadShader()) |
| 194. | { |
| 195. | printf("Unable to create shader from files: %s\n", mainShader.getFilenames().c_str()); |
| 196. | printf("Error message: %s\n", mainShader.getError().c_str()); |
| 197. | programRunning = false; |
| 198. | } |
| 199. | } |
| + 200. | |
| + 201. | |
| + 202. | |
| + 203. | |
| + 204. | |
| + 205. | |
| + 206. | |
| + 207. | |
| + 208. | |
| + 209. | |
| + 210. | |
| + 211. | |
| 212. | } |
| 213. | } |
| 214. | } |
In our handleEvents function, inside the keypress block, we add a section listening for the "t" key (full list of keys available here should you prefer something else).
If this keypress is detected, we flip our boolean and toggle the state of drawing.
Fortunately for us, rendering as wireframes can be turned on and off with a single call, and doesn't require any changes to the code or shaders, meaning our code is nice and simple.
If we're now supposed to render as wireframes, we make a call to glPolygonMode telling it that the front and back of triangles should now only be drawn with GL_LINE: in essence only drawing the edges of polygons.
On the other hand, if useWireframe is now switched off, we set the polygon mode to GL_FILL, meaning the interior of the triangles will now be filled in, and rendered normally - this is obviously the default value.
Regarding the first parameter, according to the specification, this must always be set to GL_FRONT_AND_BACK.
Why have it then?
A long time ago, it was also possible to set it differently for the front and back of triangles individually.
This was removed at some point, but to keep code compatible and the interface stable, the API has remained the same, so forces you to use this specific value.
Remember, you are looking at the front side of a triangle if, as the screen sees it, the first, second and third vertex follow a counter-clockwise direction on the screen, known as the winding order.
To conclude this tutorial, I will mention that there is a third value that glPolygonMode can be set to in the second parameter, which is GL_POINT.
This will only draw single points at the vertices of triangles, but this is usually not really a helpful setting unless you want to visualise certain kinds of data.
One more thing which may be useful to have in your mind is that while here we render everything as either a wireframe or not, OpenGL is happy for you to make these calls anywhere in your rendering code. So you could have it so that only some of your triangles are rendered as a wireframe, and the rest rendered normally.
Conclusion
In this lesson we've looked at vertices in more detail. We've introduced IBOs as an alternative way to render triangles while reducing the memory footprint of our geometry, and we've also looked at rendering that geometry as a wireframe as a debugging aid.
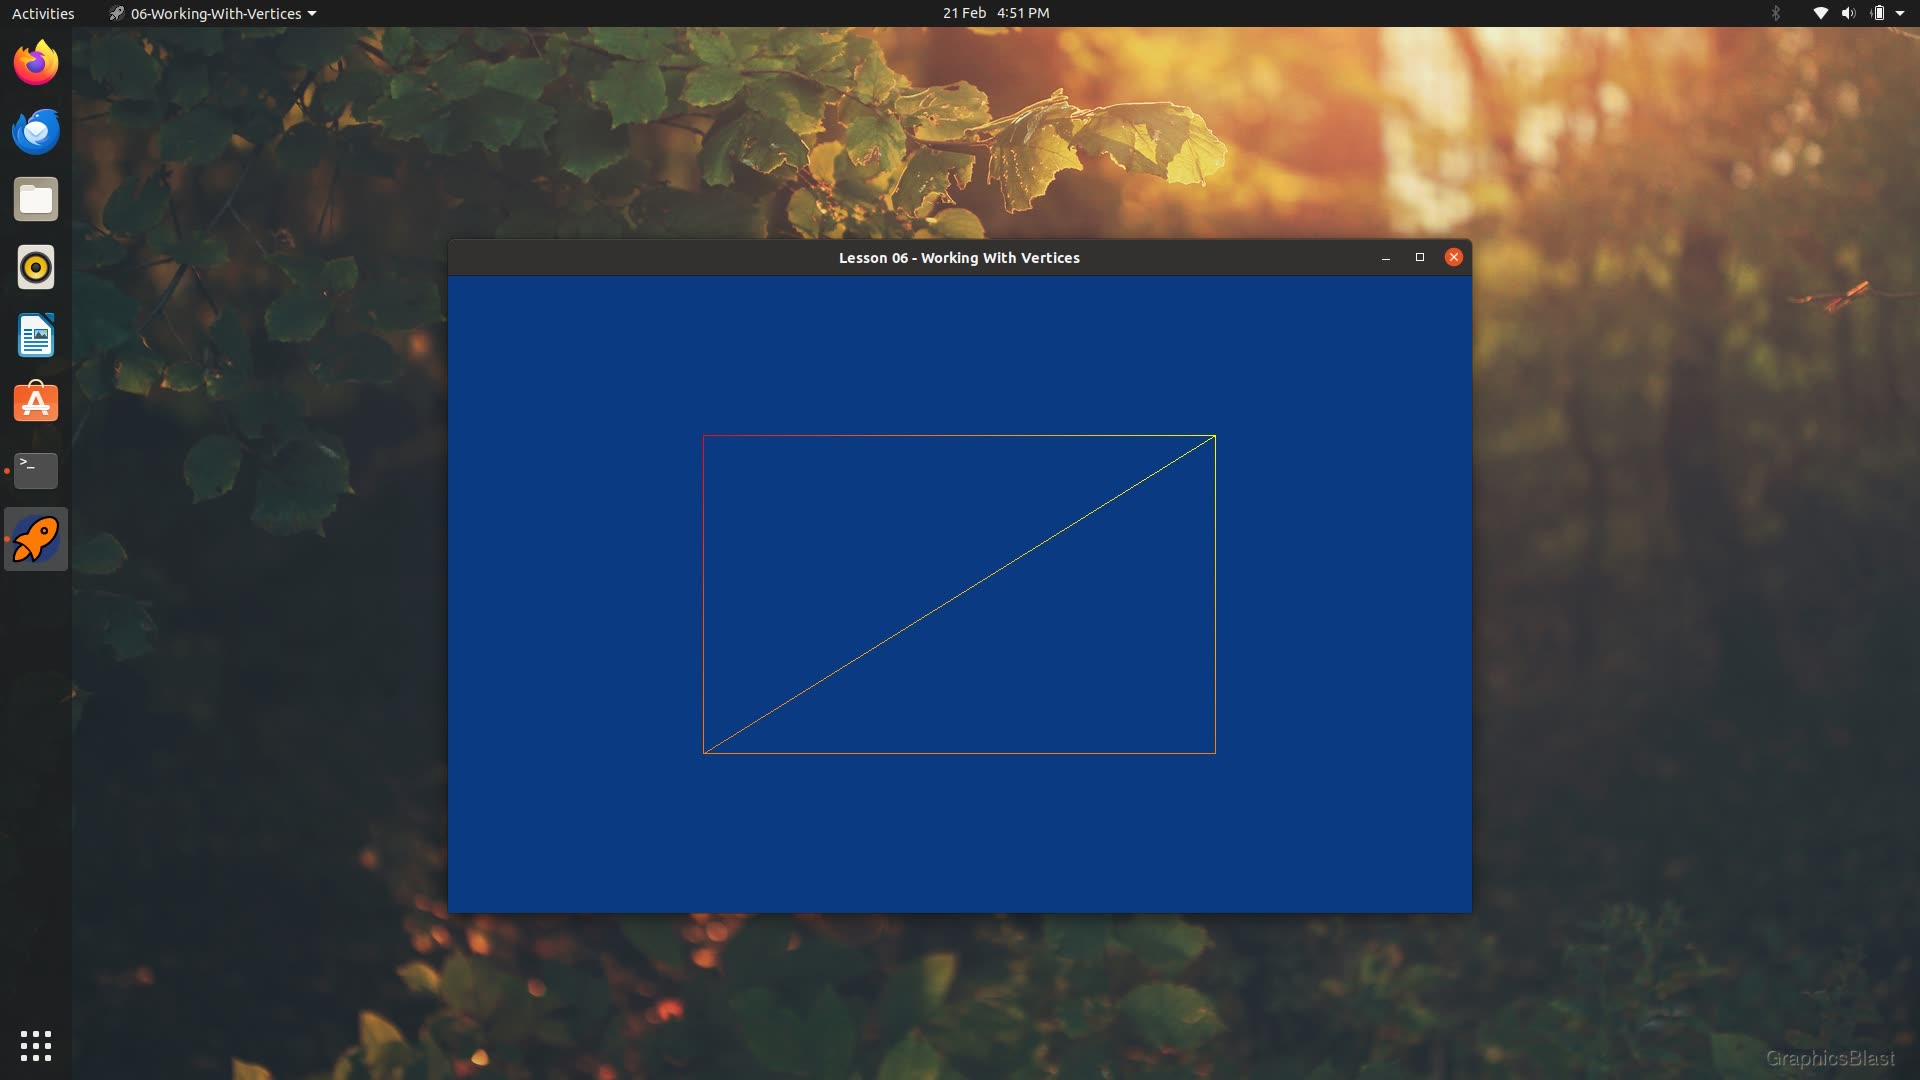
Compile your code and give it a try. If you keep tapping "t", the program should keep toggling into wireframe mode and back.
Anyway, that's all we can really see visually in our program after this lesson. In the next lesson we'll be able to see much more though; we'll look at cameras, and how we can begin to actually move around within our world. See you there!